One of the best parts about summer is finally being able to enjoy the cold treats you’ve been missing all winter. I’m talkin’ sorbet, popsicles, milkshakes, froyo, and ice cream—you know the ones that had you jumping for joy as a kid?
Well today, I’m bringing it wayyyyyy back to one of your favorite childhood treats—shaved ice, or as some people would call it, snow cones! Only this time, it’s a healthy homemade shaved ice recipe to help “adult you” stay on track with your weight loss goals and still be able to enjoy the taste and nostalgia of a delicious summer treat.
The Throw-Back Treat That Makes Your Inner Child Jump For Joy
One thing I loved about being a kid was not knowing what a calorie was, and having the freedom to eat what I wanted, whenever I wanted, essentially “without consequence”—and this, of course, includes a good ol’ fashioned shaved ice. Think about it, no matter how these summer goodies ended up in our little hands, we ate them without a care in the world—not realizing the long-term effects those sugar-filled treats would have on our health.
Unfortunately, those days are long gone—as you’re most likely aware that your relationship with sweets as an adult is completely different than the one you had when you were a kid. For example:
Childhood: Girl sees snow cone. Girl eats snow cone. Girl gets to move on with her life and is happier than before she ate the snow cone.
Adulthood: Woman sees snow cone. Woman wants to eat the snow cone. Woman argues the pros and cons of eating the snow cone. Woman convinces herself not to eat the snow cone. Woman suddenly changes her mind and eats the snow cone anyways. Woman is immediately filled with guilt and regret about eating the snow cone. Woman’s pants are a little tighter… 😫
Thankfully, this homemade shaved ice recipe is not only healthier than your run-of-the-mill snow cone, but it’s also simple enough to make at home—so you can enjoy an ice-cold treat on a hot summer day (without having to chase the ice cream truck down the street!) 😉 🍦
A Healthier Homemade Shaved Ice
Traditionally, the syrup that’s used on shaved ice is packed with artificial sugar, like high fructose corn syrup, which is known to cause weight-related health issues like obesity, metabolic disorders, high cholesterol, and more. But, that doesn’t mean you still can’t enjoy a delicious snow cone! You can easily make a healthy version of shaved ice at home.
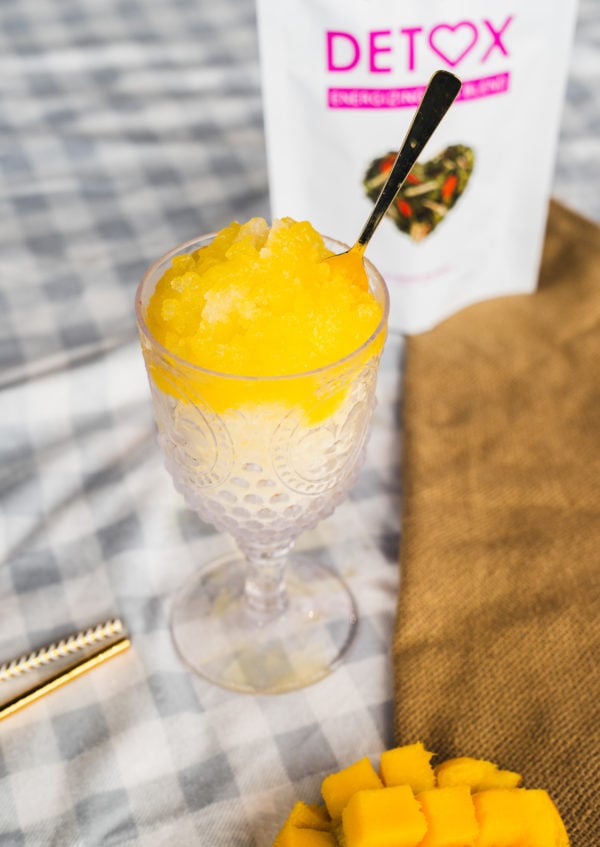
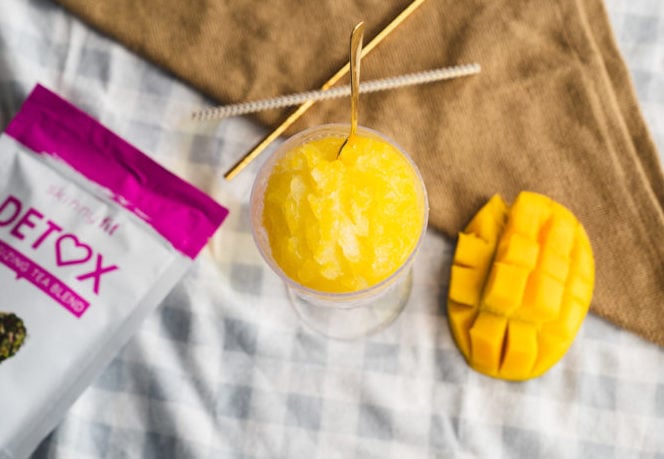
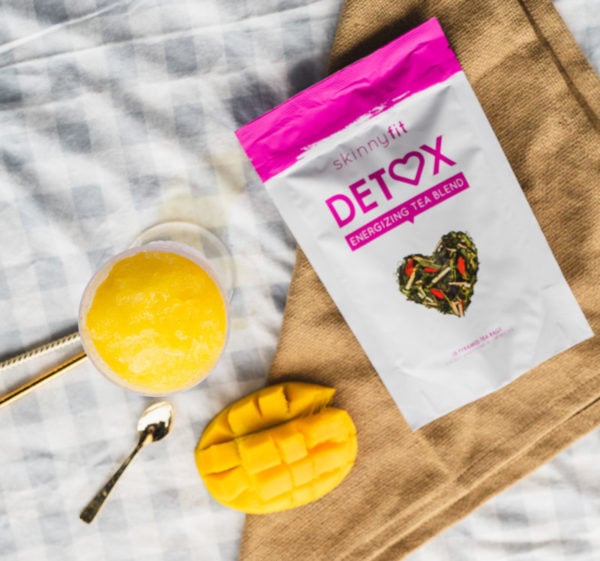
Instead of high fructose corn syrup or sugar, this homemade shaved ice recipe uses real fruit chunks, sugar-free sweetener, and SkinnyFit Detox—so it’s low-calorie and packed with 13-superfood ingredients that help flush your body of toxin buildup and boosts metabolism.
How To Make Shaved Ice At Home
Making shaved ice at home is so easy your kids will be begging to help you make it! All you need is a powerful blender, ice, your favorite fruit, your granulated sweetener of choice, and SkinnyFit Detox!
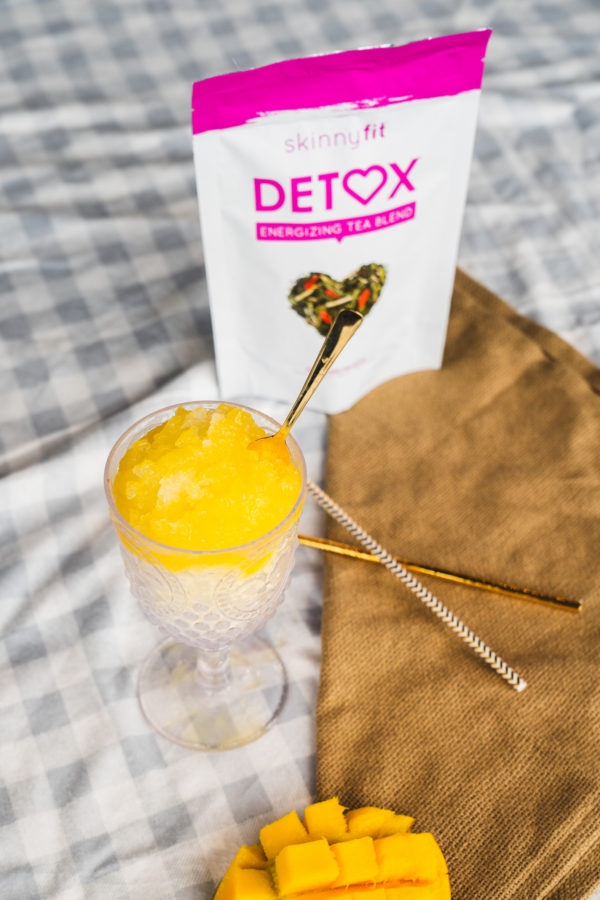
Healthy Homemade Shaved Ice Recipe
Ingredients
- 1 1/2 cups mango
- 3/4 cup SkinnyFit Detox, brewed
- 2 Tbsp lemon or lime juice
- 3/4 cup granulated sugar-free sweetener (like Stevia or Splenda)
- 2 cups ice
Steps
- Brew 1 SkinnyFit Detox tea bag in 3/4 cup of boiling water for 5-7 minutes, let cool.
- Place the mango in a blender or food processor and puree. Pour the mixture into a saucepan and add the lemon/lime juice, Detox and sugar.
- Cook over medium heat, stirring occasionally until boiling. Turn heat down slightly and continue to simmer for 5 minutes before removing from heat.
- Let the syrup cool completely and then strain with a fine mesh strainer to remove all seeds and pulp.
- Place ice in a blender to crush and transfer to a serving bowl.
- Pour the syrup over ice until it’s well coated and enjoy!